Showing posts with label Stained Glass Mosaics. Show all posts

Thursday, August 31, 2017

My First Mosaic Workshop in My Own Studio

Well this was certainly a first for me. It was such a great feeling to invite participants into my working studio to take a workshop. They were surrounded by my art, mosaic materials, and tools of the trade. Immersed is a better way to say it. Another first was using a theme provided by Marilyn who arranged to have this one day workshop for her daughter, daughter-in-law, and granddaughter. It was definitely a privilege to get to know the family. The theme of this stained glass mosaic workshop was based on a silk scarf Marilyn had bought on a trip to Spain. And it is no surprise that the scarf had had images of Anton Gaudi's famous Parc Guell mosaic masterpiece. Here are some pictures from that fun day.

Friday, November 27, 2015

My Glass on Glass Mosaic Mandala Process

I recently was asked by the Society of American Mosaic Artists (SAMA) to write about the process I use when I create my mosaic mandalas for Groutline, SAMA's electronic newsletter. I thought I would share here on Tumbling Tesserae.


1)   First cut out a circle of 1/8" plate or window glass. Take a piece of 1/4"zinc came and bend it using a zinc came bender (found at stained glass shops). Fit the zinc came around the glass circle and cut the came so it fits snugly to the glass. Solder the two ends together to form a secure joint. Once that is complete, you will have a "glass canvas" on which to work.


2)   Next cut your tesserae from selected stained glass. I like to use ring mottled glass because I love the jewel colors and combinations along with the surrounding translucent shading of glass around it


3)   I cut almost all my pieces ahead of time. Clean the tesserae. Put them in a recycled margarine container with lid., add a drop or two of liquid soap and some water, and shake vigorously. Rinse until there are no more suds. Drain and let dry.


4)   Put your design underneath the prepared glass substrate and tape it to the zinc edge. The pattern  is directly below where you will glue your tesserae. Clean the top side of the glass before you start gluing. I clean my glass with rubbing alcohol. My current adhesive of choice is MacGlue. It dries clear in about 20-25 minutes and creates a strong durable bond. 


5)   Then start gluing tesserae along major design lines following the pattern. Fill in remaining areas one color at a time. As you can see. I tend to work from corners when completing a section. Once the corners have been filled in, the remaining spaces become more defined and it is easier to find a close match. I usually lay out a placement of the tesserae like I want it first. Then I take them off, spread the glue and replace the tesserae to their correct position.


6)   If you look closer at the glued tesserae, you will see that the interstices are fairly tight, but like the shape of each tessera , they are far from perfect. Consistency is more important than precision in my approach.


7)   Once you have finished gluing the pieces and the glue has dried, it is time to grout.  Mix the grout and apply to the mosaic surface. I use sandless grout and add an acrylic mortar additive, but you can use sanded grout if that is your preference.


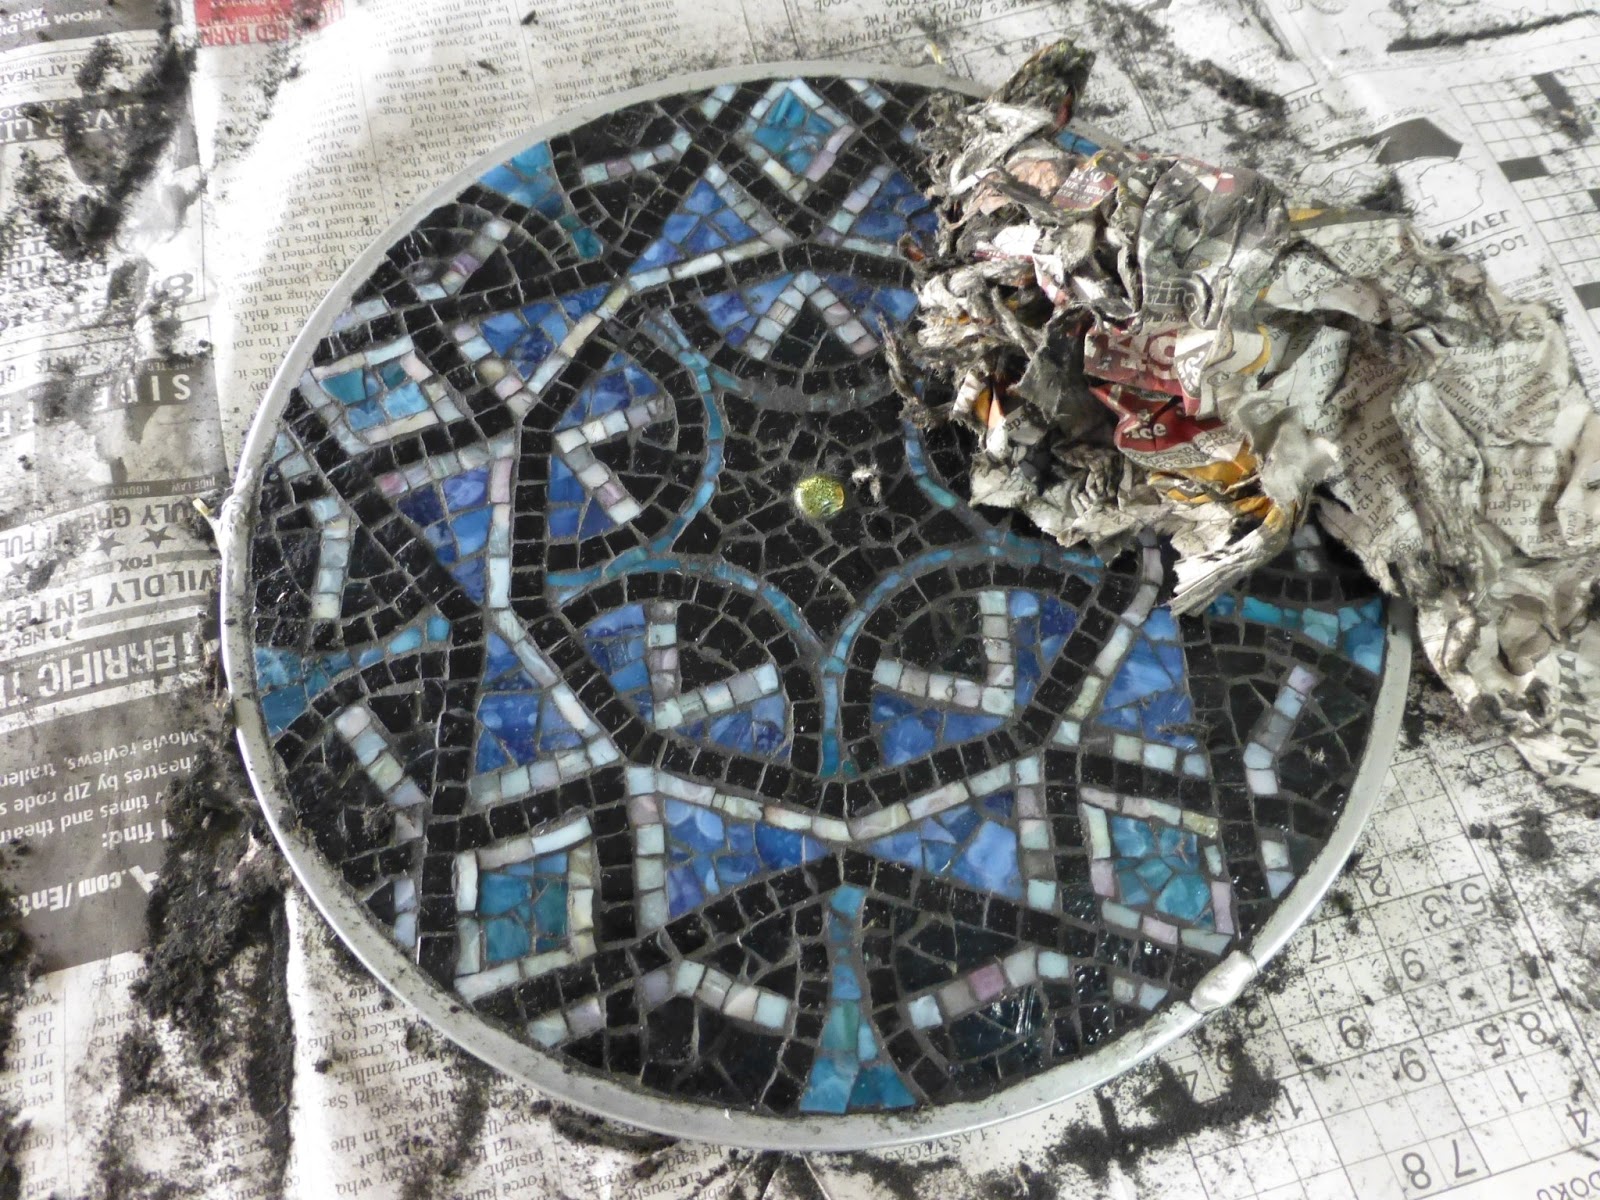
8)   Wipe off the grout after it has started to set (usually about 20 minutes) using a circular motion. I like ot use crumpled up newspaper that serves as a paper rags. Use them and throw them away. The mosaic design should now reappear.


9)   Finish polishing the mosaic by putting some dry grout on the top of the mosaic. Using a paper rag and later a well worn soft toothbrush, rub off any remaining grout residue from the surface of the tesserae. (I save the gritty grout mixture after I am finished for the next time.) You can also use a dental pick to do the final clean up as needed.


10)   Solder rings or hangers to the zinc frame so that the mosaic can be hung in the window. After a day, you may want to do a quick scrub with a brush using half vinegar/half water solution to really have the mosaic sparkle. Attach a chain and enjoy your creation.


David Chidgey
303 Oakleaf Dr.
San Antonio, TX 78209

www.facebook.com/artglassmosaics

www.flickr.com/artglassmosaics

Saturday, April 20, 2013

Mandala Series: Play and Self Discovery


It started with me making my first stained glass or glass-on-glass mosaic mandala and then another and another. I didn't consciously set out to do a series of mandalas. Rather, enjoyment, pure and simple, from the different steps of the whole process provided the reinforcement until it has become almost a habit. In other words, I was simply having fun and playing. As I look back, I recognize that there were discoveries along the way.

For example, I discovered that I was a hunter. I really enjoyed the "hunt" for special art glass (i.e. ringed mottle Bullseye, Lins, Uroborus). Since each pane of glass is handmade and unique, I would literally go through the whole inventory of stained glass shops to find the treasure I was looking for. Eventually, the owners and sales staff would be on the lookout for me. I would walk in and "bam", they would take out special sheets to show me. For a time, it seemed that I enjoyed the hunt more than creating the mosaic. Searching for the best art glass distracted me from actually getting to work creating art. Lesson learned!

Not knowing how to actually go about cutting my tesserae, I just jumped in and started nipping my stained glass into random pieces. This random approach morphed into what I call my "controlled random" approach. lolol I learned that four and five sided shapes were my friends, that triangular shapes would show up whether or not you initially cut them that way (as you modify other shaped tesserae with your nippers), and that consistent sizes and shapes (i.e. long rectangles for my outlining and spirals) were equally important. Lesson learned! (At the time I had no idea what andamento was which was probably good so I would be more spontaneous and playful and not worry about "doing it right".)

While I used so called "choo-choo" method to outline or organize the design of my mandalas, I relied on a different method to fill in the empty areas. Out of a "sea" of tesserae (the result of my "controlled random" approach), I would search for the "right"  tessera for the empty space. The final product was a collection of various shapes and sizes that, although not perfect, seem pleasing to my eye. In the process, one personal "rule" emerged: "try to avoid any tessera, combination of tesserae, or spaces between them, that would draw attention."  All tesserae should "work" together to create a beautiful whole. Let the non-repeating pattern communicate a sense of peaceful meditation.  Lesson learned!


One last discovery that never ceases to amaze me relates to the grouting process with these glass-on-glass mandalas. After working for hours on the mandala and having glued hundreds and hundreds of tesserae, the time comes to cover all your hard work and beauty of the art glass with grout. Although I have done this well over a hundred times, I still have some anxiety about what could go wrong (ex. grout seeping underneath a tessera or curing too quickly and hardening on the mosaic surface, a tessera that you thought was securely attached "disappears" - YIKES!). Yes, I am speaking from experience. lol


Time and time again the ungrouted mandala seems to experience a major transformation. First covering it with "mud", waiting in anticipation, deciding it is time to wipe off the excess grout, and finally cleaning it. During the wiping off stage when I lift the mandala up to the light to check for potential issues, I start to marvel at the beauty emerging through the veil of grout and haze. Once again during the cleaning stage, I lift the mandala up and look closely. Like a proud father helping in the birth process, feelings of anxiety accompany my sense of exhilaration until I am sure the process has gone well. Honestly, I would never have thought it would affect me this way, but it does.

The final result of grouting the mandala, however, is what is important. With dark grout "framing" the tesserae, each tessera's unique color, tone, and degree of transparency is accentuated. For me the result is like a beautiful tapestry, but in this case, with light interacting with glass, rich in color and texture. My Mandala Series has provided me great opportunities to play, to observe and refine my work, and to look deeper. Currently, that exploration is directed to kaleidoscope patterns and the concept of mosaic as tapestry. Hmmmmmmmmmm, I can't wait!